Ticket Zoom
Use this screen to see the details of a ticket. The Ticket Zoom screen is available, if you click on a ticket in any other screens.
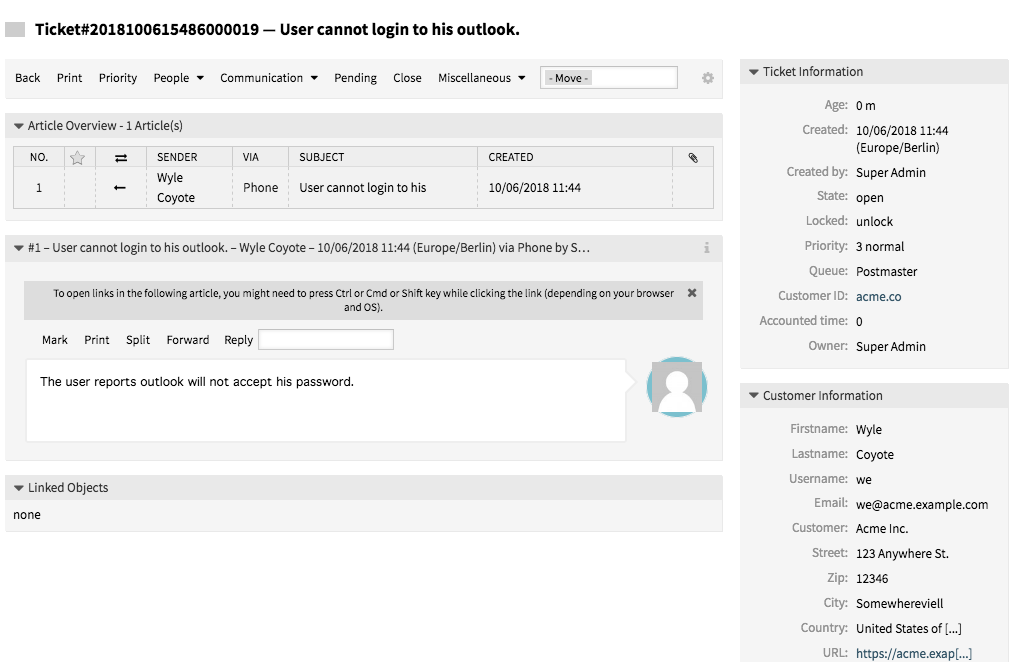
Ticket Zoom Screen
This screen has an own menu and contains several widgets.
Ticket Menu
The Ticket Zoom screen has an own menu.
The menu is extensible and menu items can be grouped into drop-down lists.

Ticket Menu
- Back
- This menu item goes back to the previous screen.
- This menu item opens a PDF file to show the printer friendly version of the screen. You can save or print this PDF file.
- Priority
This menu item opens a new window to change the priority of the ticket.
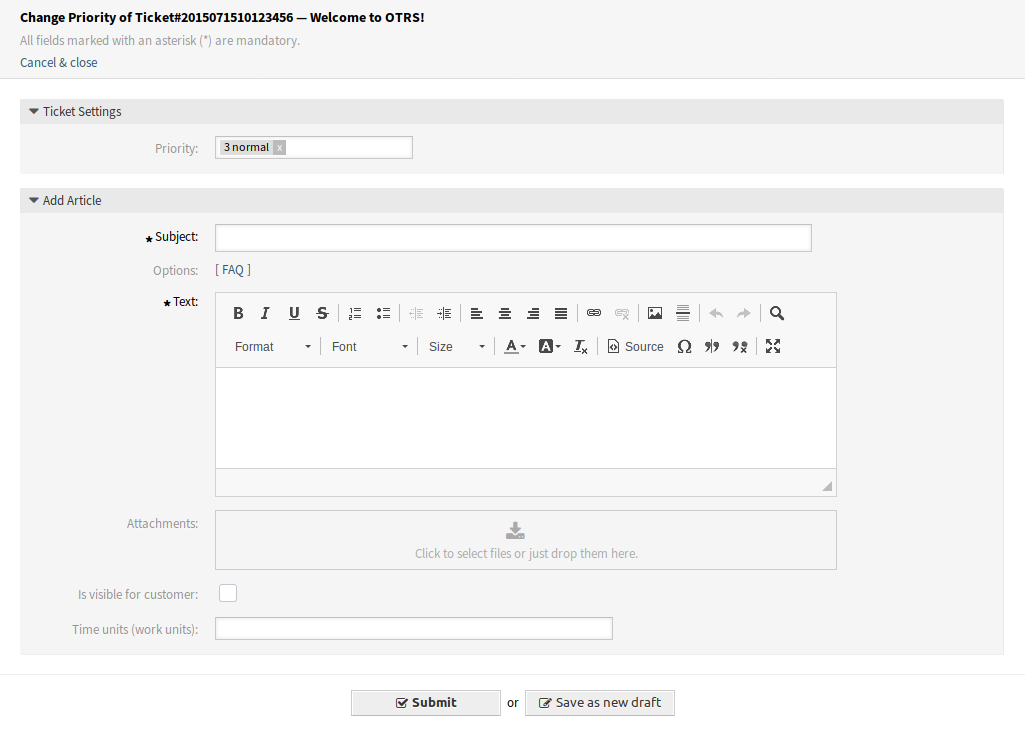
Change Priority Screen
- Priority
- Select the new priority for the ticket.
- Subject *
- The subject of the ticket like the subject of an email.
- Options
- It is possible to add other objects like customer users or FAQ articles to the ticket.
- Text *
- The body text of the note to be added to the ticket.
- Attachments
- It is possible to add attachments to the ticket. Click on the field to add an attachment, or just drop some files here.
- Is visible for customer
- Define, if the note is an internal note or customer can view it.
- Time units (work units)
- Enter any amount of time units for time accounting.
- People
This menu item groups the following menu items together:
- Owner
This menu item opens a new window to change the owner of the ticket.
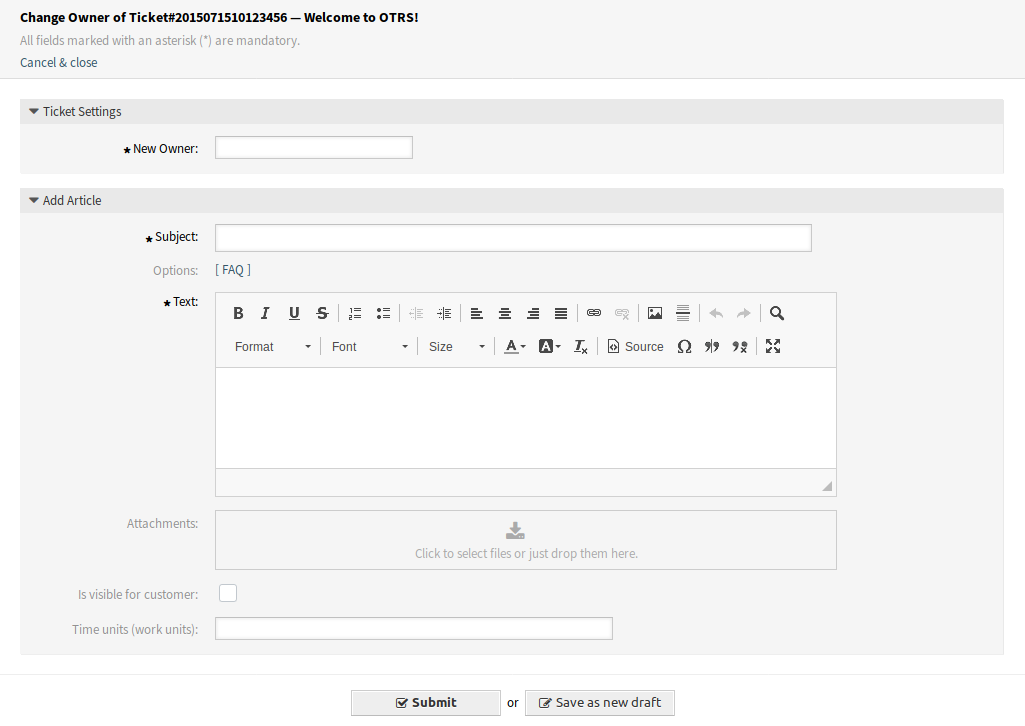
Change Owner Screen
- New Owner *
- Select the new owner agent from the list. The agent needs owner permission, otherwise the agent is not listed.
- Subject *
- The subject of the ticket like the subject of an email.
- Options
- It is possible to add other objects like customer users or FAQ articles to the ticket.
- Text *
- The body text of the note to be added to the ticket.
- Attachments
- It is possible to add attachments to the ticket. Click on the field to add an attachment, or just drop some files here.
- Is visible for customer
- Define, if the note is an internal note or customer can view it.
- Time units (work units)
- Enter any amount of time units for time accounting.
- Customer
This menu item opens a new window to change the customer of the ticket.

Change Customer Screen
- Customer user *
- The new customer user of the ticket.
- Customer ID
- Automatically selected based on the customer user.
- Communication
This menu item groups the following menu items together:
- Note
This menu item opens a new window to add a note as new article to the ticket.
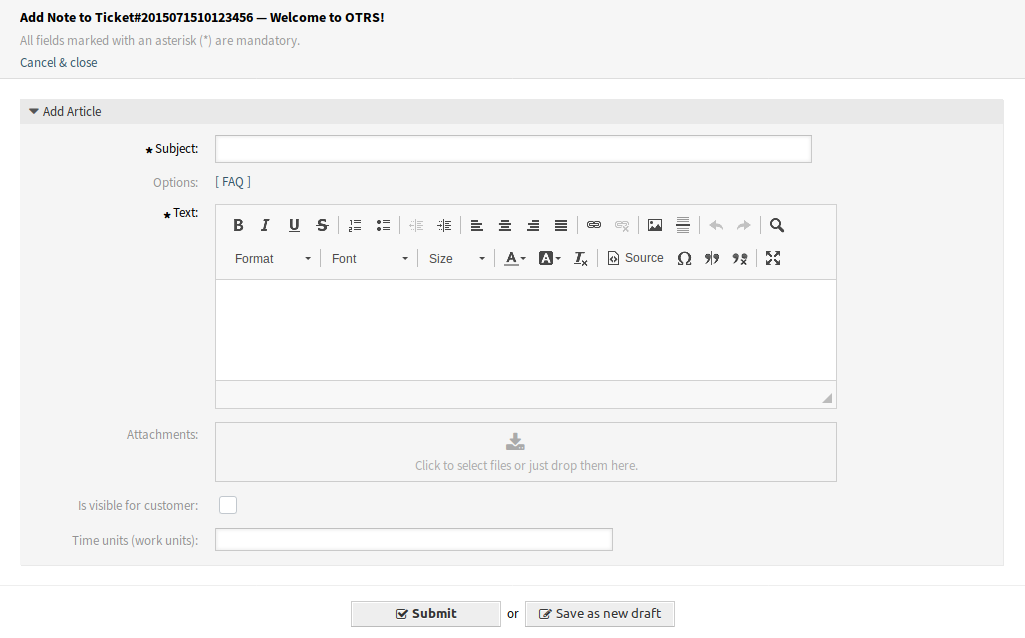
Add Note Screen
- Subject *
- The subject of the ticket like the subject of an email.
- Options
- It is possible to add other objects like customer users or FAQ articles to the ticket.
- Text *
- The body text of the note to be added to the ticket.
- Attachments
- It is possible to add attachments to the ticket. Click on the field to add an attachment, or just drop some files here.
- Is visible for customer
- Define, if the note is an internal note or customer can view it.
- Time units (work units)
- Enter any amount of time units for time accounting.
- Phone Call Outbound
This menu item opens a new window to add a note based on an outgoing phone call to the ticket.
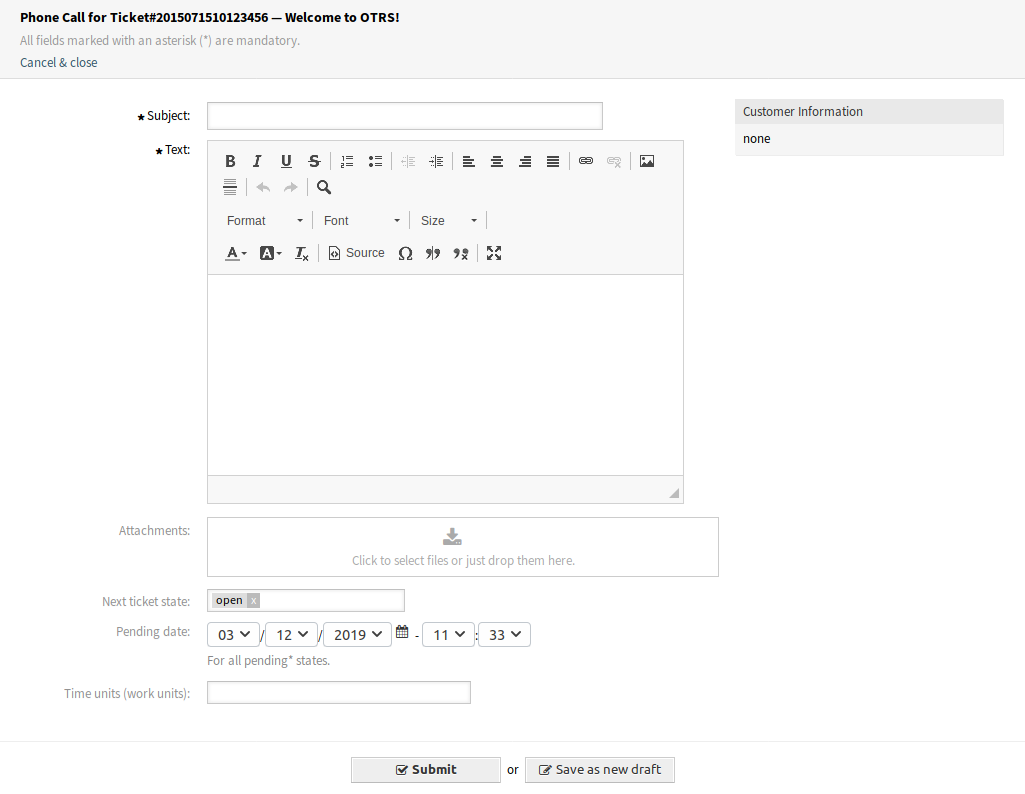
Phone Call Screen
- Subject *
- The subject of the ticket like the subject of an email.
- Options
- It is possible to add other objects like customer users or FAQ articles to the ticket.
- Text *
- The body text of the note to be added to the ticket.
- Attachments
- It is possible to add attachments to the ticket. Click on the field to add an attachment, or just drop some files here.
- Next ticket state
- Select an other state if you want to change it.
- Pending date
- Select a date and time as reminder for the ticket. If the pending time is reached, the ticket can be escalated.
- Time units (work units)
- Enter any amount of time units for time accounting.
- Phone Call Inbound
This menu item opens a new window to add a note based on an incoming phone call to the ticket.
This screen is the same as Phone Call Outbound screen.
- E-Mail Outbound
This menu item opens a new window to send an email and add the email as article to the ticket.
This action is typically used to involve third parties via email without the customer user of the ticket being able to view this mail communication. For this reason, the article is not visible to the customer user by default. If the addressee (the third party) sends a reply email, this reply is also not visible to the customer user of the ticket.
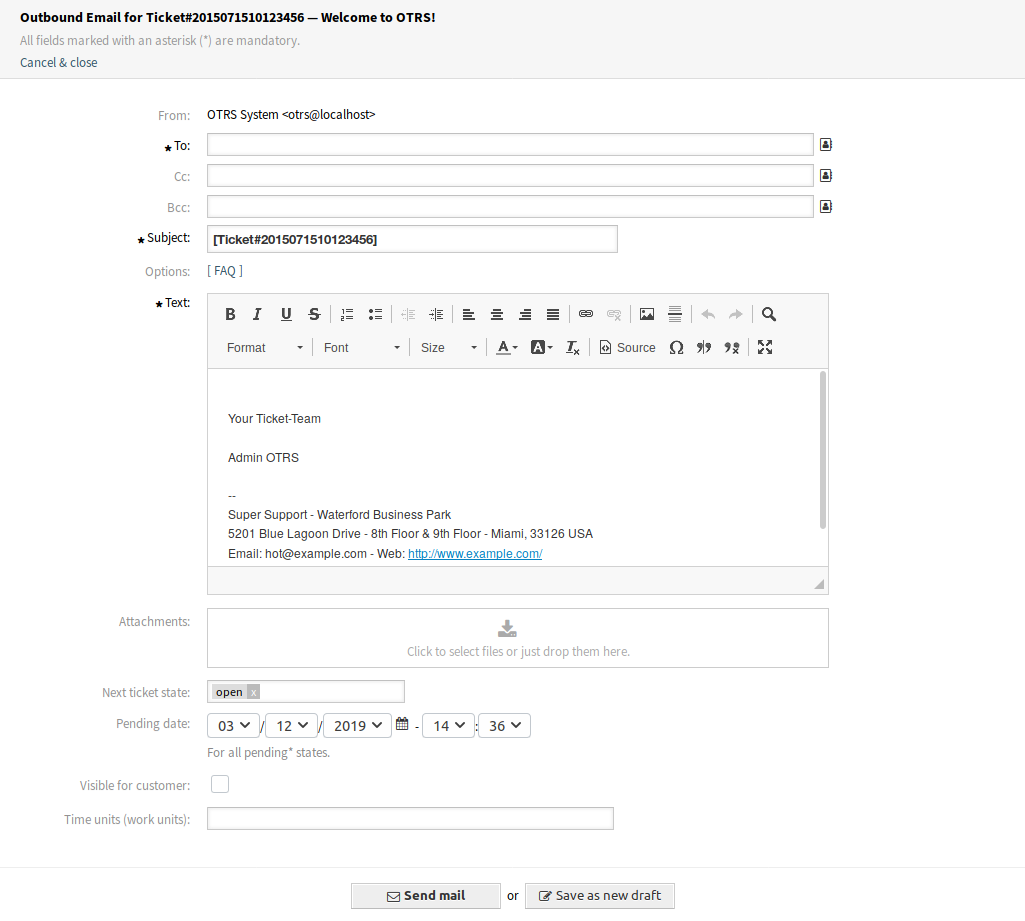
Outbound Email Screen
- From
- This field is read only and holds the queue address.
- To *
- This will be the To field of the email.
- Cc
- Select other customer users as carbon copy of the email, if needed.
- Bcc
- Select other customer users as blind carbon copy of the email, if needed.
Note
You can select a customer user from OTRS or any valid email address can be added here.
Usage of wildcards (*) is also possible. Enter two asterisks (**) to list all customer users.
- Subject *
- The subject of the ticket like the subject of an email.
- Options
- It is possible to add other objects like customer users or FAQ articles to the ticket.
- Text *
- The body text of the note to be added to the ticket.
- Attachments
- It is possible to add attachments to the ticket. Click on the field to add an attachment, or just drop some files here.
- Next ticket state
- Select an other state if you want to change it.
- Pending date
- Select a date and time as reminder for the ticket. If the pending time is reached, the ticket can be escalated.
- Visible for customer
- Define, if the note is an internal note or customer can view it.
- Time units (work units)
- Enter any amount of time units for time accounting.
- Pending
This menu item opens a new window to set the pending time of the ticket.
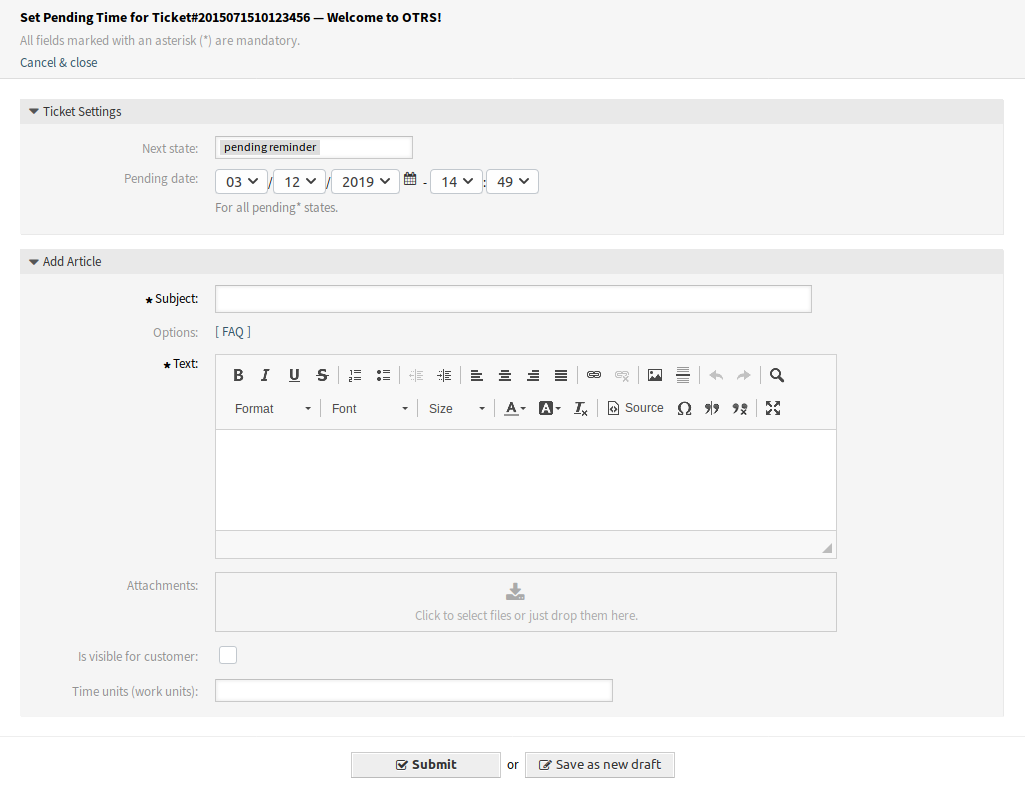
Set Pending Time Screen
- Next state
- Select the pending state of the ticket.
- Pending date
- Select a date and time as reminder for the ticket. If the pending time is reached, the ticket can be escalated.
- Subject *
- The subject of the ticket like the subject of an email.
- Options
- It is possible to add other objects like customer users or FAQ articles to the ticket.
- Text *
- The body text of the note to be added to the ticket.
- Attachments
- It is possible to add attachments to the ticket. Click on the field to add an attachment, or just drop some files here.
- Is visible for customer
- Define, if the note is an internal note or customer can view it.
- Time units (work units)
- Enter any amount of time units for time accounting.
- Close
This menu item opens a new window to close the ticket.
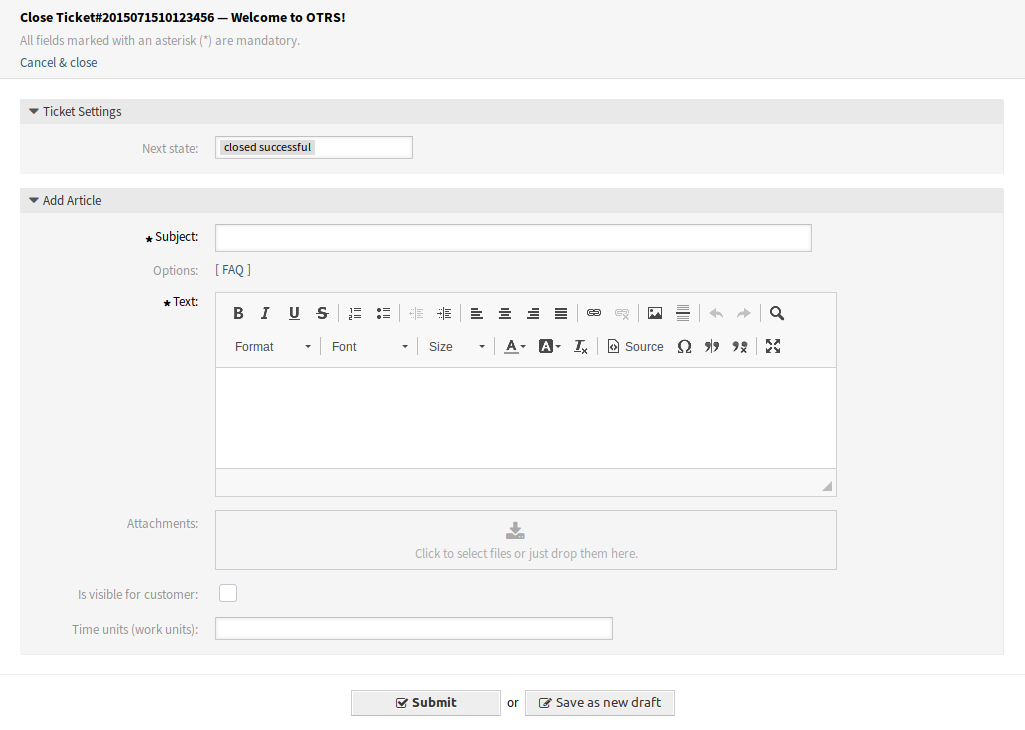
Set Pending Time Screen
- Next state
- Select the closed state of the ticket.
- Subject *
- The subject of the ticket like the subject of an email.
- Options
- It is possible to add other objects like customer users or FAQ articles to the ticket.
- Text *
- The body text of the note to be added to the ticket.
- Attachments
- It is possible to add attachments to the ticket. Click on the field to add an attachment, or just drop some files here.
- Is visible for customer
- Define, if the note is an internal note or customer can view it.
- Time units (work units)
- Enter any amount of time units for time accounting.
- Process
This menu item opens the New Process Ticket screen to start a process from this ticket.
Note
This option is available only, if at least one process is deployed in the system.
- Miscellaneous
This menu item groups the following menu items together:
- Lock or Unlock
The name of the menu item depends on the lock state of the ticket.
- Lock
- If the ticket is unlocked, an agent can lock the ticket and the agent becomes the ticket owner.
- Unlock
- If the ticket is locked to an agent, the agent can release the ticket and other agents can lock it.
Warning
This menu item has no confirmation window. Lock or unlock the ticket is done immediately.
- History
- This menu item opens a new window to see the history of the ticket.

Ticket History Screen
Note
If several entries are added to the history, use the filter box to find a particular entry by just typing something to filter.
- Free Fields
- This menu item opens a new window to change the free field values of the ticket.

Ticket Free Text Screen
- Title *
- The title of the ticket.
- Link
This menu item opens the standard link screen of OTRS. Tickets can be linked to other tickets, FAQ articles or appointments. Existing links can also be managed here.
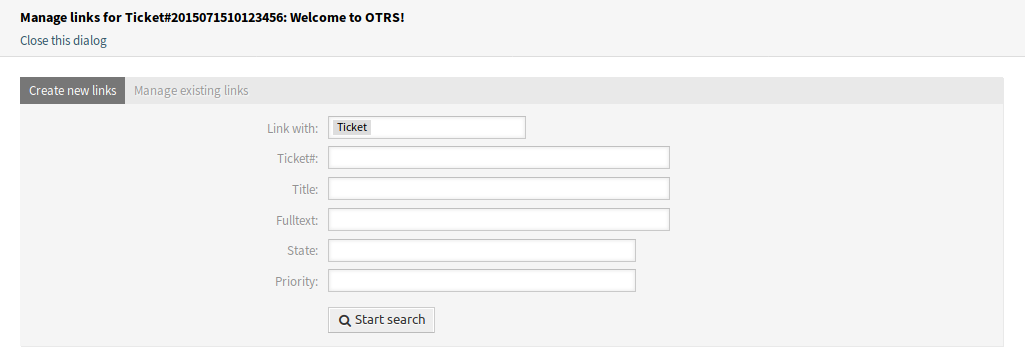
Link Ticket Screen
- Link with
- Select the other object the ticket should be linked to.
The other fields can be used to find the appropriate object to link, and the fields can be different for each object.
- Merge
This menu item opens a new window to find a destination ticket for the current ticket. The articles of current ticket will be moved to the destination ticket, and the current ticket will get the state merged.
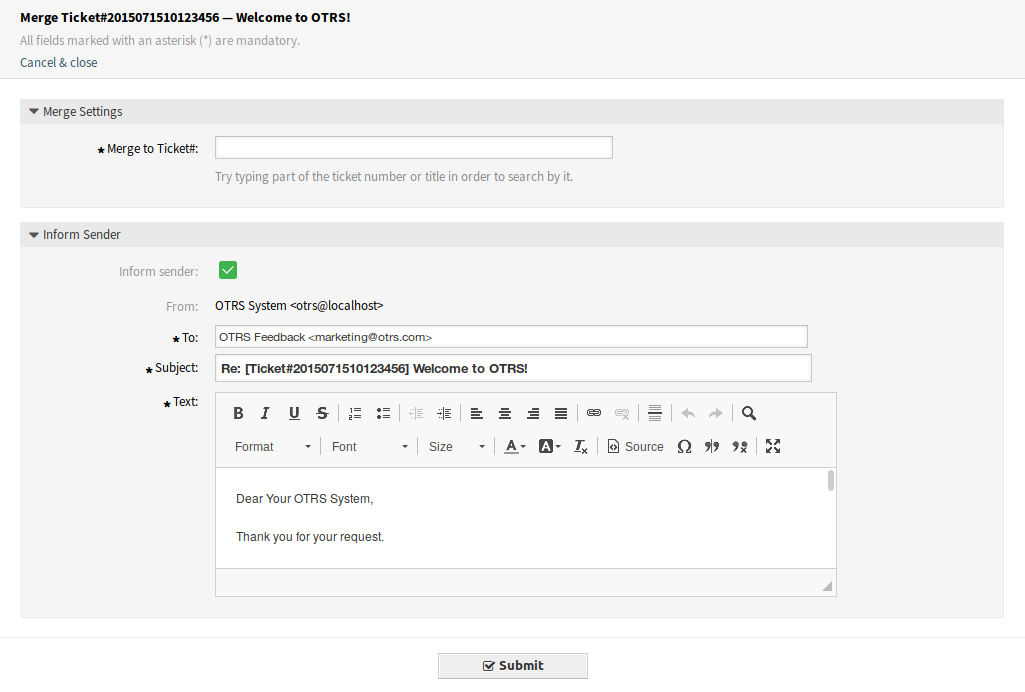
Ticket Merge Screen
- Merge to Ticket# *
- Try typing part of the ticket number or title in order to search by it.
- Inform sender
- Check this box, if you would like to inform sender about ticket merge. If this box is checked, the following fields must be filled.
- From
- This field is read only and holds the queue address.
- To *
- This will be the To field of the email.
- Subject *
- The subject of the ticket like the subject of an email.
- Text *
- The body text of the email to be sent.
- New Appointment
- This menu item opens the New Appointment dialog, and selects the current ticket in the Ticket field for linking.
- Queue
This menu item is only a drop-down list of available queues. Select a destination queue, if the ticket needs to be moved there.
Warning
This menu item has no confirmation window. Moving the ticket to an other queue is done immediately.
- Settings
Click on the gear icon in the right side of the ticket menu to change the article view settings. The following options are available:
- Show one article
- Only the article is displayed in the Article Zoom widget, which is selected in the Article Overview widget.
- Show all articles
- All articles are displayed in the Article Zoom widget under each other.
- Show Ticket Timeline View
- Articles are displayed in a timeline without Article Overview widget and article menu.
Article Overview
This widget lists all articles of the ticket in a table.

Article Overview Widget
Most of the columns are sortable by clicking on the header. Click again to change the sort order.
There are three possible colors used to mark the type of article.
- White: the article is visible for the customer user in the external interface and for agents in the agent interface.
- Red: the article is not visible for the customer user in the external interface, but it is visible for agents in the agent interface.
- Yellow: the article is a system message and the visibility can be changed in the system configuration.
Note
This widget is not displayed in ticket timeline view.
Article Zoom
This widget displays the details of the article. The widget has an own menu.
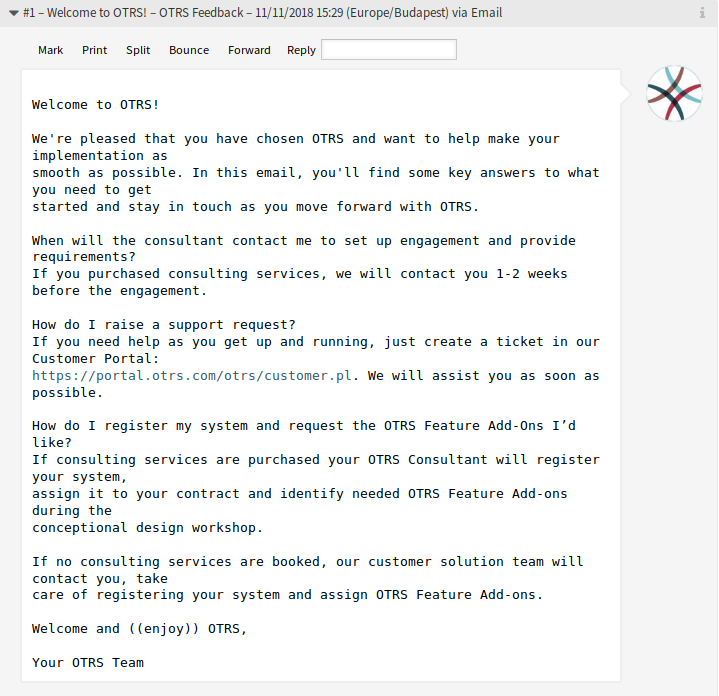
Article Zoom Widget
The menu is extensible and menu items can be grouped into drop-down lists.
- Mark or Unmark
- Use this menu item to mark article as important or to remove the important flag from the article. Important articles have a red information flag in the Article Overview widget.
- This menu item opens a PDF file to show the printer friendly version of the current article. You can save or print this PDF file.
- Split
Use this menu item to split the article to an other ticket. Select the new ticket type and click on the Submit button.

Article Split Dialog
It is possible to split the article into several type of ticket.
- Email ticket
- Selecting this will open the New Email Ticket screen and fill in the fields with the current article data.
- Phone ticket
- Selecting this will open the New Phone Ticket screen and fill in the fields with the current article data.
- Process ticket
Selecting this will open the New Process Ticket screen and fill in the fields with the current article data.
Note
This option is available only, if at least one process is deployed in the system.
- Bounce
Use this menu item to redirect the article. The original article will be sent, so the new To person will see the email as it was originally sent to him or her.
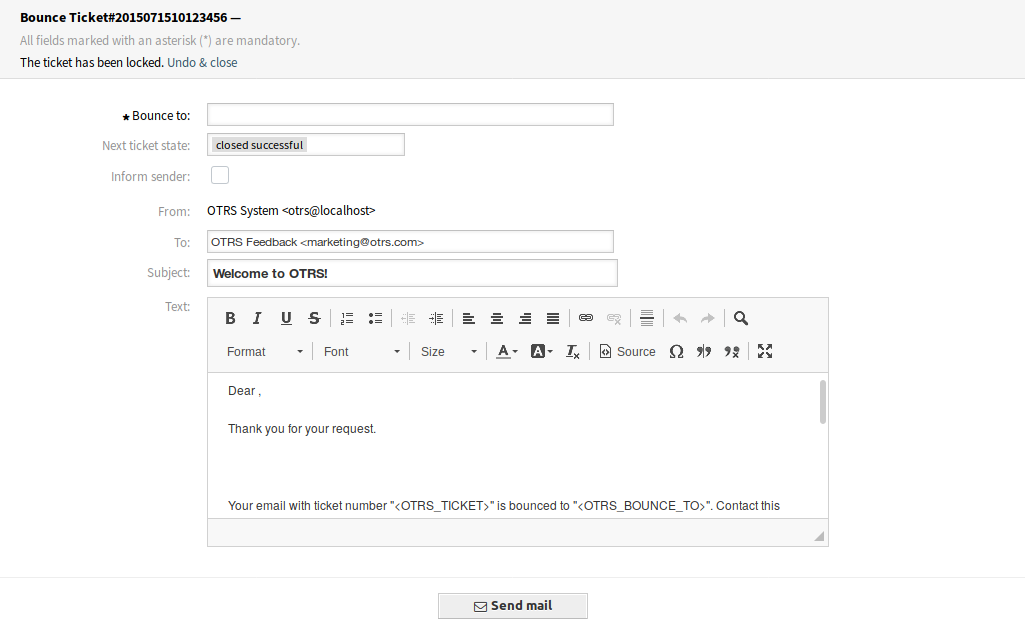
Article Bounce Screen
- Bounce to *
- The email address where the article needs to be redirected. The sender of the redirected email is the original sender of the article.
- Next ticket state
- Select the closed state of the ticket.
- Inform sender
- Check this box, if you would like to inform sender about bouncing. If this box is checked, the following fields must be filled.
- From
- This field is read only and holds the queue address.
- To *
- This will be the To field of the email.
- Subject *
- The subject of the ticket like the subject of an email.
- Text *
- The body text of the email to be sent.
- Forward
Use this menu item to forward the article via email.
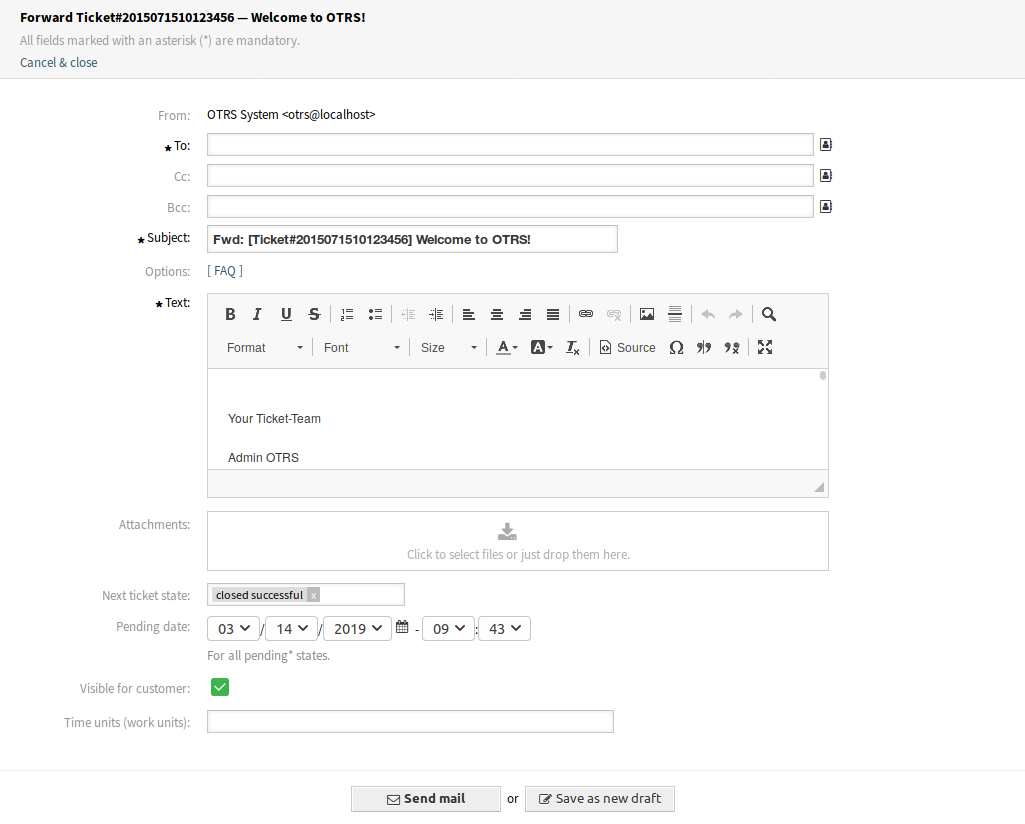
Article Forward Screen
- From
- This field is read only and holds the queue address.
- To *
- This will be the To field of the email.
- Cc
- Select other customer users as carbon copy of the email, if needed.
- Bcc
- Select other customer users as blind carbon copy of the email, if needed.
Note
You can select a customer user from OTRS or any valid email address can be added here.
Usage of wildcards (*) is also possible. Enter two asterisks (**) to list all customer users.
- Subject *
- The subject of the ticket like the subject of an email.
- Options
- It is possible to add other objects like customer users or FAQ articles to the ticket.
- Text *
- The body text of the note to be added to the ticket.
- Attachments
- It is possible to add attachments to the ticket. Click on the field to add an attachment, or just drop some files here.
- Next ticket state
- Select an other state if you want to change it.
- Pending date
- Select a date and time as reminder for the ticket. If the pending time is reached, the ticket can be escalated.
- Visible for customer
- Define, if the note is an internal note or customer can view it.
- Time units (work units)
- Enter any amount of time units for time accounting.
- Reply
Use this menu item to compose an answer to the article via email. Reply is created from a response template set in Templates module of the administrator interface.
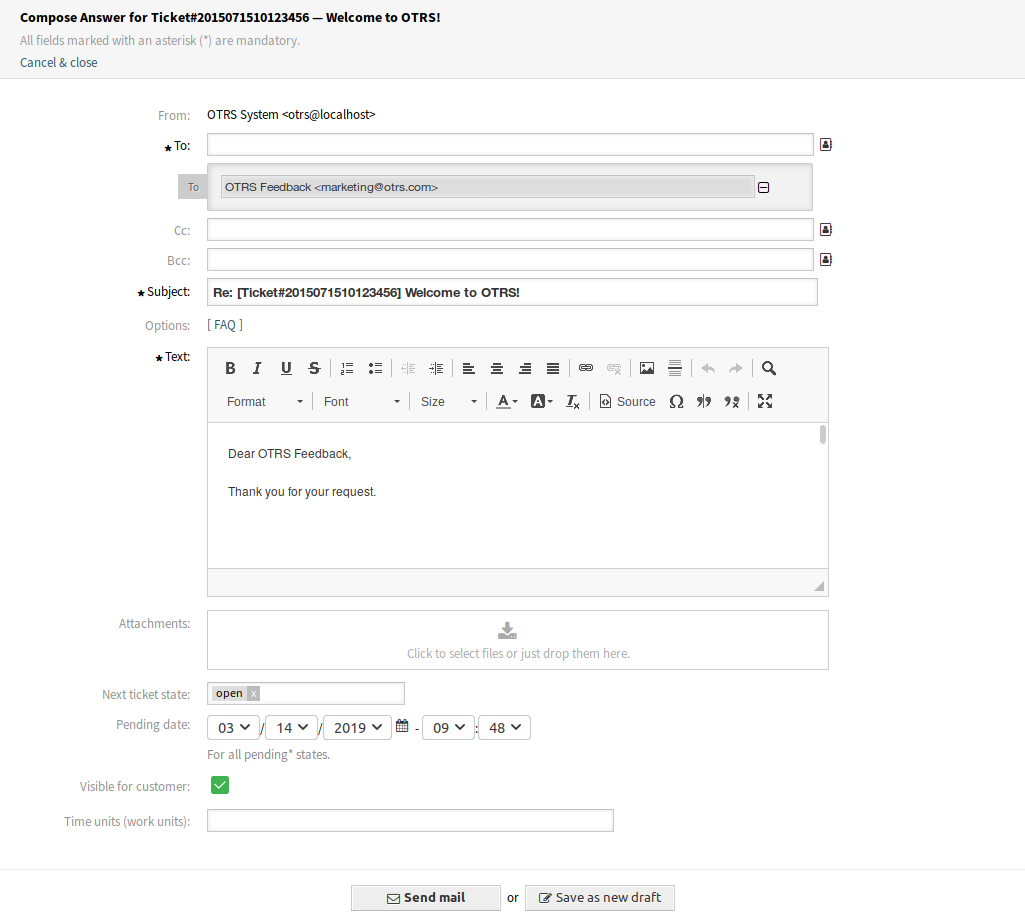
Compose Answer Screen
If the sender of an article is not the customer user, this action sets the original sender into the To field and adds the customer user to the Cc field for external articles. If the article is internal, then the original sender is set into the To field (if email is available) and the customer user is not added to the Cc field or any other fields.
- From
- This field is read only and holds the queue address.
- To *
- This will be the To field of the email.
- Cc
- Select other customer users as carbon copy of the email, if needed.
- Bcc
- Select other customer users as blind carbon copy of the email, if needed.
Note
You can select a customer user from OTRS or any valid email address can be added here.
Usage of wildcards (*) is also possible. Enter two asterisks (**) to list all customer users.
- Subject *
- The subject of the ticket like the subject of an email.
- Options
- It is possible to add other objects like customer users or FAQ articles to the ticket.
- Text *
- The body text of the note to be added to the ticket.
- Attachments
- It is possible to add attachments to the ticket. Click on the field to add an attachment, or just drop some files here.
- Next ticket state
- Select an other state if you want to change it.
- Pending date
- Select a date and time as reminder for the ticket. If the pending time is reached, the ticket can be escalated.
- Visible for customer
- Define, if the note is an internal note or customer can view it.
- Time units (work units)
- Enter any amount of time units for time accounting.
- Reply All
Use this menu item to compose an answer to all recipients of the article via email. Reply is created from a response template set in Templates module of the administrator interface.
This menu item is visible only if the article has more than one recipient. The reply all window uses the same fields as the reply window above.
If the sender of an article is not the customer user, this action sets the original sender into the To field and adds the additional recipients and the customer user to the Cc field for external articles. If the article is internal, then the original sender is set into the To field (if email is available) and the additional recipients are added to the Cc field; the customer user is not added to the Cc field or any other fields.
Ticket Timeline View
The ticket timeline view provides a chronological view of all actions which happened on a ticket, like articles, owner changes, incoming mails and other actions. With this view, agents are able to get a good overview of a ticket in less time.
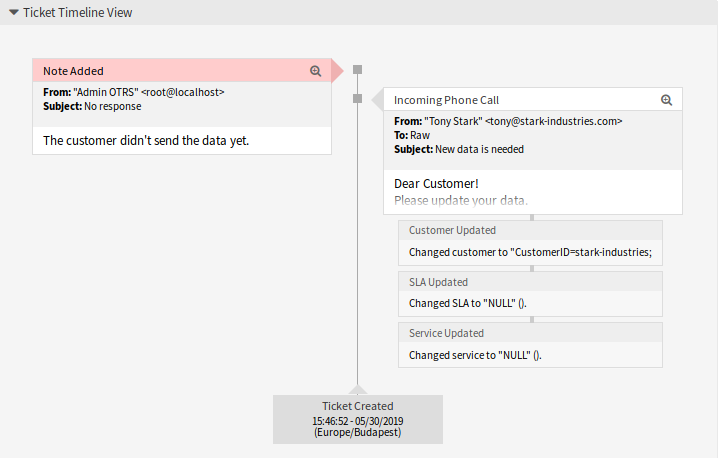
Ticket Timeline View Widget
In this view you can work on the ticket as you are used to. You can inspect the time of each event in the timeline by hovering the little square next to each event with your mouse cursor. You can view the full content of articles by using the zoom icon on top of the certain articles box, where you will find all common article actions.
See also
The ticket timeline view can be activated in the Settings menu item (gear icon) in the ticket menu.
Linked Objects
Tickets can be linked to other objects. Use this widget to see the links between the ticket and other objects.

Linked Objects Widget
New links can be added by the Link menu item of the Ticket Zoom menu. Existing links can also be managed there.
To see the linked object details, click on an entry in this widget.
See also
Change setting LinkObject::ViewMode to Complex to display detailed information about linked objects.

Complex Linked Objects Widget
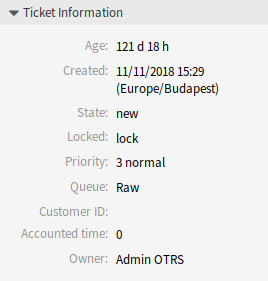
Customer Information
This widget contains information about the customer.

Customer Information Widget